

Beginner Needle Felting Project – Winter Robin and The Nature Book Club for Kids
One of the things that I remember fondly from my childhood is the Nature Table that my parents set up for us. Throughout the year we would add parts and take away items like adding a branch from a Christmas Tree in early winter or a nest we found in Spring. One of the added extra’s for winter was a small felted Robin that my parents found in a set of Christmas Ornaments. Each winter the Robin would take pride of place on the nature table and my brother and I would look out of the window to try and spot our garden Robin too. Now I have kids of my own having a nature table is something that we have continues but alas we haven’t had a Robin before. So here we go a tutorial on how to make a Needle Felted Robin for beginners and a fantastic monthly book club for kids of all ages and you to join in with each month.

The Nature Book Club
If you are a regular reader of Rainy Day Mum you will know how much we love our books and especially bringing them away from the pages. The Nature Book Club is another way that you can combine this but also with exploring the natural world throughout the seasons. Each month has a theme with this first month being Winter Birds and Nests.
Among the cohosts, each will feature a fabulous book that connects with the topic and then create a craft, activity or experience that you can use with your children.
Next month’s theme is revealed at the end of this tutorial for creating your own Winter Bird for your Nature Table.

Encourage more birds in your garden or backyard by providing food – see how to make your own bird feed ideal for feeding the winter visitors.
Our Nature Book Choice for January
We have included affiliate links to some of the products and resources as an associate we may earn from qualifying purchases.
There are so many great choices for Winter Bird Books and Books about nests but for our book connection, I wanted something that really connected with the Nature that our children see and learn a little more about our most frequent winter garden visitor. Coming Home by Michael Morpurgo focuses on a little Robin and his journey from Scandinavia to an English garden during the winter months.
Unlike the American Robin, the British Robin is a colourful little bird who is a mainstay in our garden, fields, and towns throughout the year – they stake their territory and can be quite vicious to other robins that venture into the area.
They are also the feature of one of our classic children’s winter rhymes – The North Wind Doth Blow
The North Wind Doth Blow,
And we will have snow!
And what will poor robin do then!
He’ll sit in a barn and keep himself warm,
With his head hid under his wing,
Poor Thing!
Take your activities outside this Winter with our Fun Simple ideas for Outdoor Winter Activities for Toddlers and Preschoolers</a
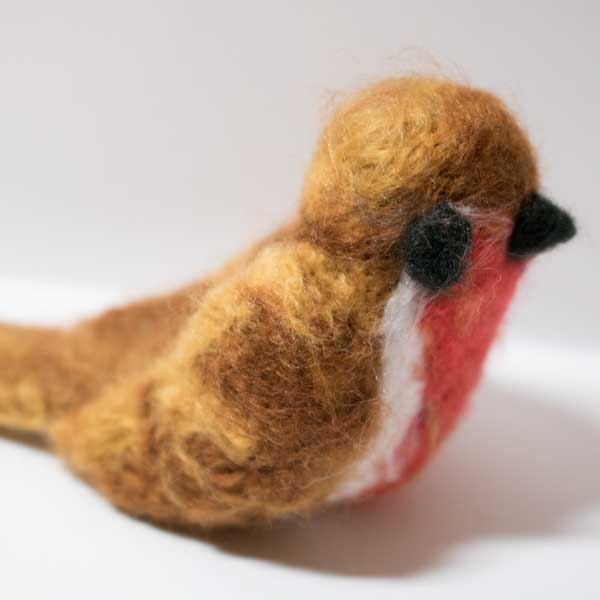
Making a Robin for your Winter Nature Table
I will admit that apart from a couple of 2D goes at Needle Felting I have never made a 3D structure before and as I made it I photographed and made notes because if I can work on it then I believe so can you.
See our Needle Felted Penguin and Hearts for more Needle Felting Projects for beginners.
Materials Needed to create your Needle Felted Robin
We have included affiliate links to some of the products and resources as an associate we may earn from qualifying purchases.
Needle Felting Needles (I broke a couple so it’s a good idea to have a selection)
Wool Roving in White, Red, Black, and Browns
An egg-shaped cookie cutter is optional and helped me form my shape at first.
How to Make your Beginner 3D Needle Felting Project – Winter Robin
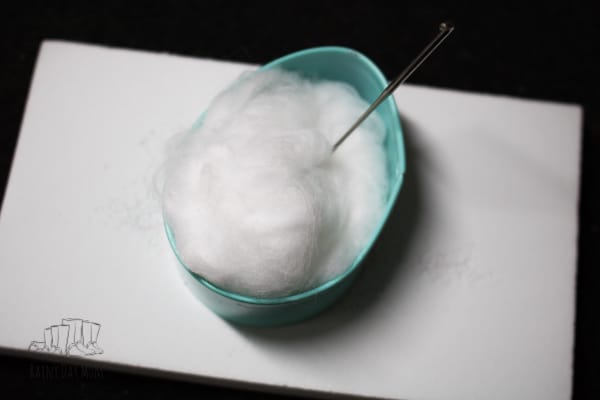
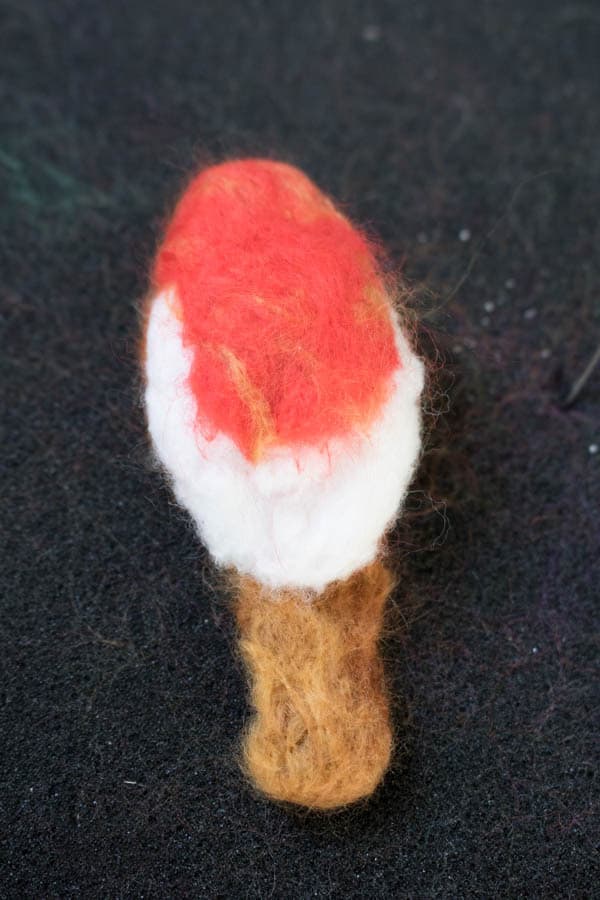
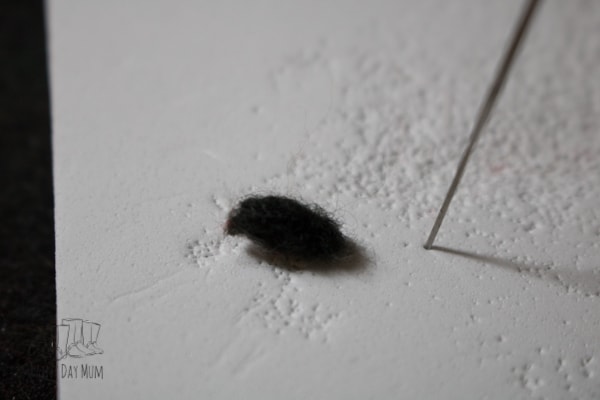
- Start by taking your white wool roving and foam it into an egg shape to make the body of your Robin. I used the egg-shaped cookie cutter to help me make the form.

- Then start to stab. As you stab push the needle into all of the notches and then pull out in the same direction.
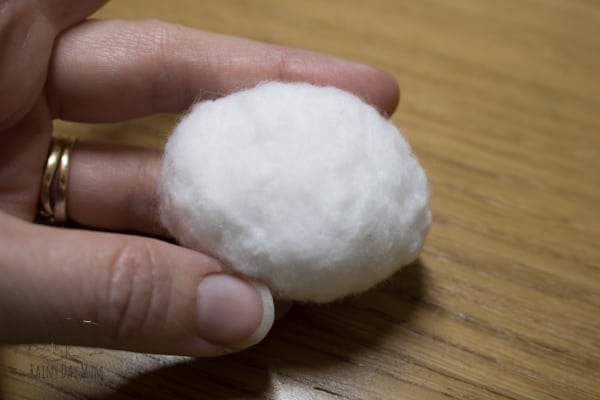
- Once the egg starts to form remove from the cookie cutter and hold in your hand and on the pad moving the egg around go in at angles at either end. Rotating the egg shape.
- It took me around 15 minutes to get a solid felted shape by rotating the egg and stabbing it from different angles. Needle felting isn’t a quick process it takes time but it is relaxing as you do it.
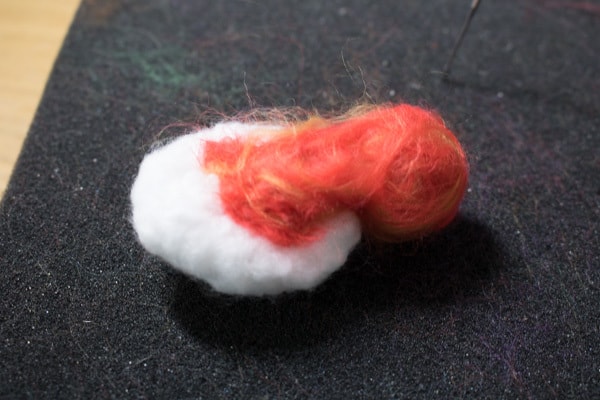
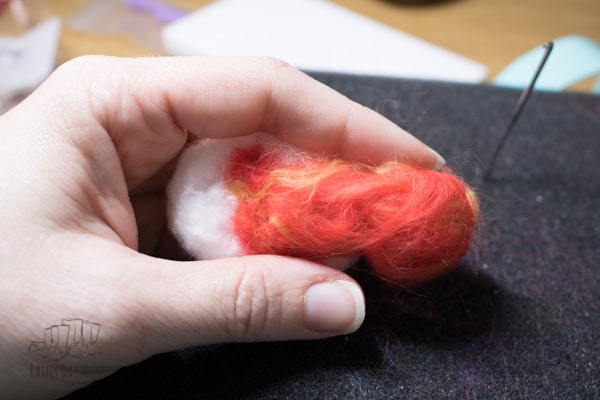
- With the egg formed it’s time to add the features that make up the robin – starting with its bright red breast. Take some of the red wool roving and place on the part of the egg shape that will be the red breast and face of your robin.
- Using the needle stab the red wool felting it into form the Robin’s body.
- As you go you will probably find you need more red wool. Add this and felt it into place.
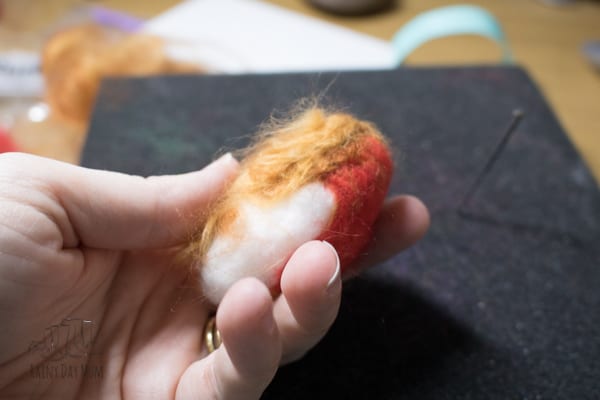
- Once you are happy with the red breast of the Robin it’s time to add in the brown that makes up it’s back and head area. I mixed together two colours of brown by taking sections from each brown and mixing them together.
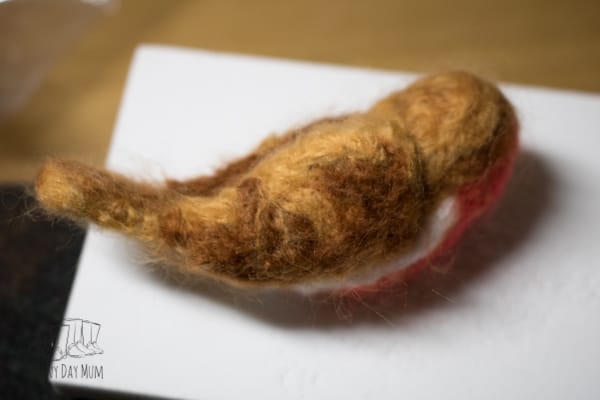
- Place on the head in a Toupee kind of effect and then felt into place stabbing with the needle – remember to pull out the same direction that you went in.
- Continue adding more browns to form the back.
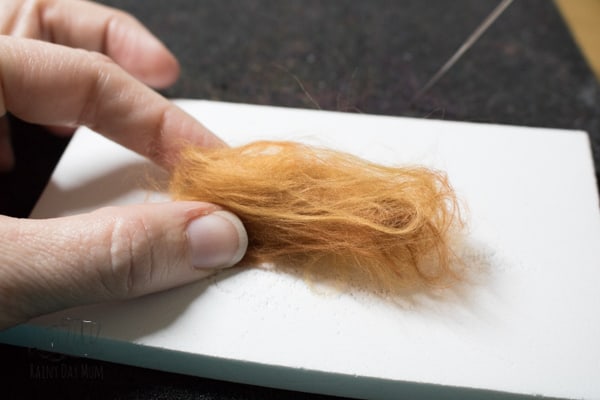
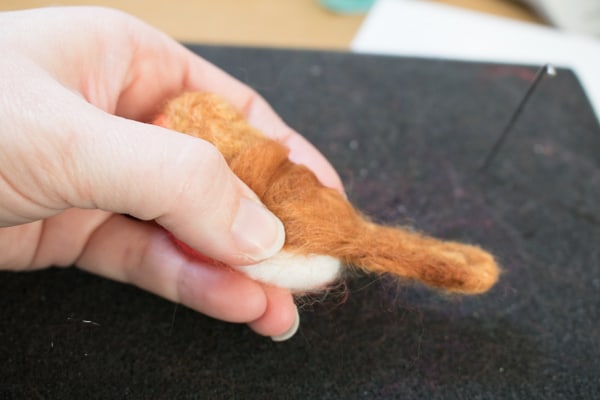
- The tail I formed separately – take the browns and roll into a compacted sausage shape.
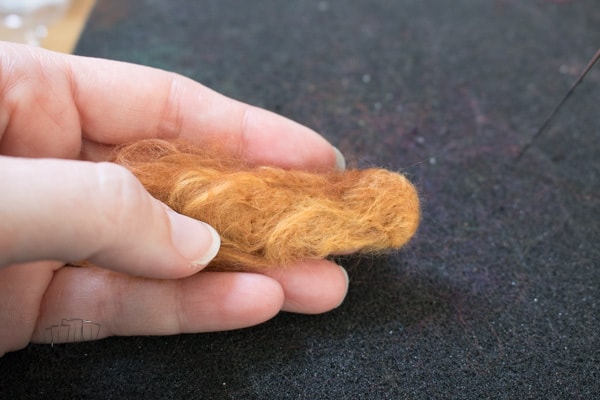
- Lay this sausage on the needle felting pad and using the needle felt it together. This was one of the hardest parts because of working with a much smaller size of an object.
- Leave one end of the tail free so that you can felt it onto the back and bottom of your Robin.
- Place the tail on the robin and needle felt it into place.
- Keep adding more browns until you are happy with the covering of the Robin’s body and tail.

- Now it’s time to add in 2 wings – for the wings, I formed the shapes away from the Robin in my hands and then added them onto the Robin and felted them in place.
- Bring the wings around to lay over the tail and felt them together.
- Before adding the eyes and beak it’s worth shaping the body more. I did this with a combination of my hands and the needle. Felting some areas denser to make them move to the position that I wanted. I also added some more wool roving to help the shape form better.
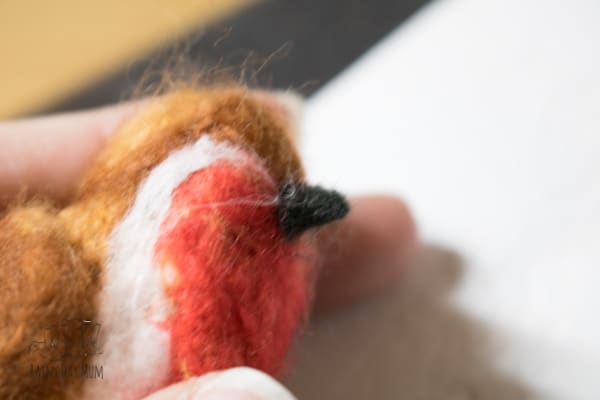
- The eyes are made by forming a small part of black wool roving into a dot and then placing on the eye position.
- Then felt in around the outside edge of the dot first to fix the shape in place.
- After that felt the middle of the eye until it’s flat and attached to the Robin’s Head.
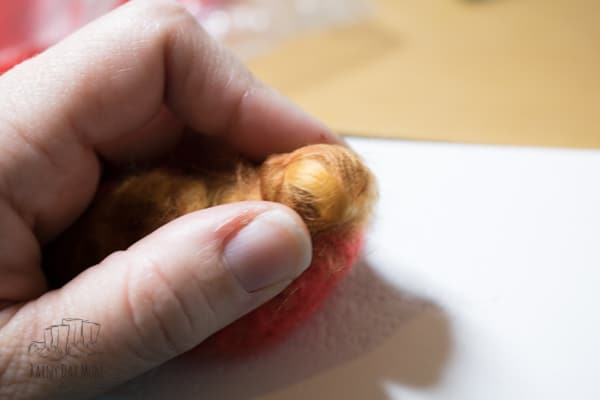
- For the beak – take the black wool roving and form a very small sausage shape – leave lots on the outside and then on the pad continuously turning felt into a beak shape with a free flowing tail.
- With the beak shape formed as you like cut the free-flowing tail off.
- Place the beak on and felt around the bottom to attach and make any adjustments that you wish.
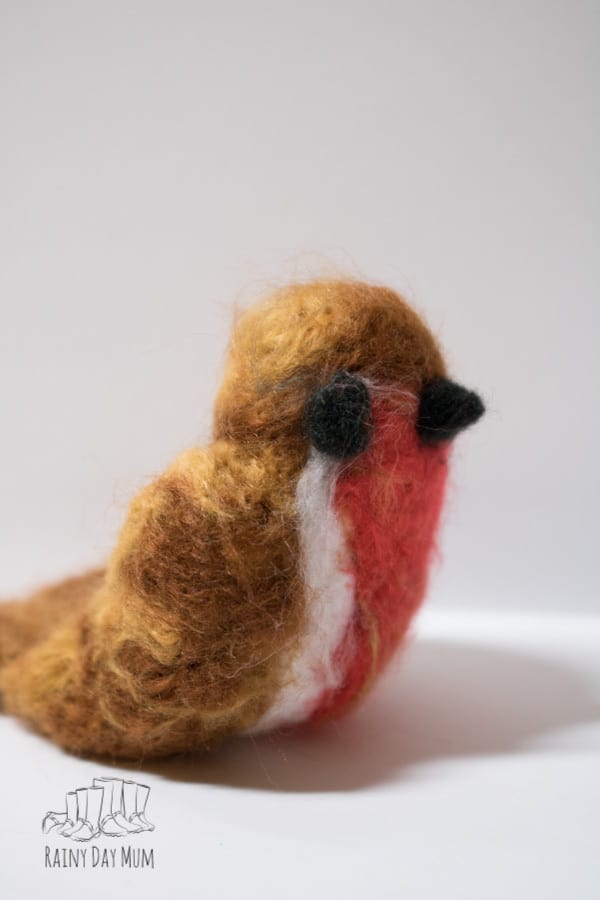
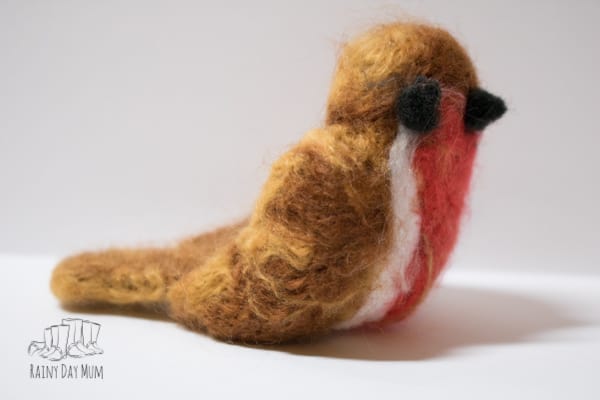
The Robin is now complete and we have added it to our Nature Table.
Looking for other ideas for your Nature Table then why not make a wet felted mat for it with our full tutorial on how to create one ideal for a Winter theme.
More Winter Birds and Nest Themed Books and Activities for Nature Based Learning
Check out these 14 other ideas for Winter Birds and Nest themed Nature Study and Learning from this month’s cohosts and check out the gift at the end that The Homeschool Scientist is sharing with you this month.
Here are the co-hosts, their choices of books, and activities for the month.
Something 2 Offer
Birds, Nests, and Eggs Nest Scavenger Hunt
The Usual Mayhem
The Boy Who Drew Birds Free artist study set (John James Audobon)
Preschool Naturally
Whose Nest Is This? Nest Building Activity
Tina’s Dynamic Homeschool Plus
(Backyard Bird Series) Cardinals – Free Northern Cardinal Unit Study & Lapbook.
Rule This Roost
Fine Feathered Friends: All About Birds – DIY Bird Feeders
Hide The Chocolate
Those Darn Squirrels Fly South – Free online book club.
The Homeschool Scientist
Birds, Nests, and Eggs – Make a Suet Feeder
Forgetful Momma
Snowy Owls Snowy Owl Craft
Table Life Blog
A Nest is Noisy – Art Project.
Eva Varga
Ravens in Winter: Nature Study Activities and Lessons for Teens – Winter Bird ID
Wind in a Letterbox
Birds for Beginners in Southern Africa – Nature Journal Entry
Rainy Day Mum
Coming Home – Needle Felted Robin
Freshly Planted
Nests – Nest weaving
Next month’s Theme for The Nature Book Club is Small Mammals.
Pin this Needle Felting Project for your Winter Nature Table to Make Later
Share this Beginner Needle Felting Tutorial With Others on Facebook
This looks like fun and you made a great tutorial for those of us who haven’t worked with felt before. Thanks! I will be pinning this to my nature board.
Thank you – I hope that it helps encourage others to work with natural materials more. And thanks for the pinning as well.
I’ve never tried felting before. This robin is so sweet.
I hadn’t either until just over a year ago – you should give it a go and thank you I’m happy with how it’s turned out and now the kids want to put it in the garden and do an experiment to see how territorial our garden robin is…