

Phases of the Moon Craft for Kids
Of all the things in the night sky, the moon is the things that my kids have always found the most interesting.
How it waxes and wanes throughout the month.
As space activities and crafts are one of our favourite themes to explore with kids this simple moon craft is great to make and can aid learning.
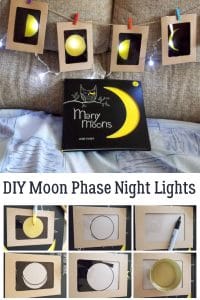
This simple Phases of the Moon for kids craft is to create a Lunar Cycle Light display is easy and fun to make and they can hang up to remind them of the moon phases.

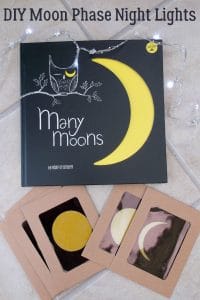
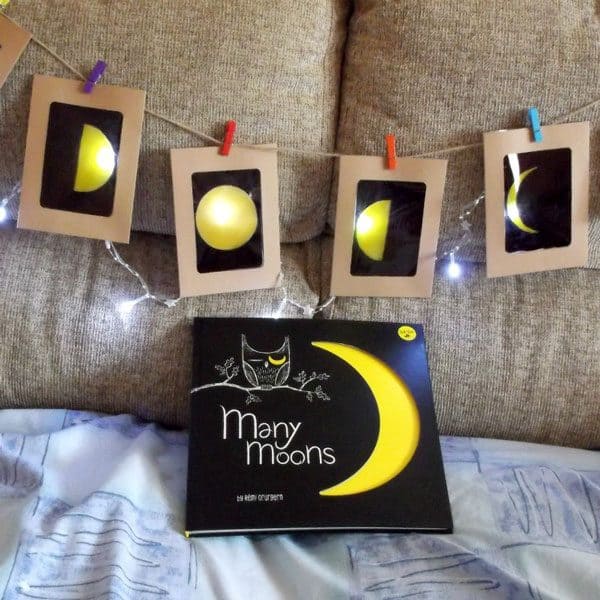
Many Moons by Remi Courgen – Moon Book for Preschoolers
We have included affiliate links to some of the products and resources as an associate we may earn from qualifying purchases.

Many Moons by Remi Courgen, shows children how to look at the phases of the moon by comparing the shapes with things they will know and recognise. A wonderful book that is beautifully written and has striking black, white and yellow illustrations.
I really enjoyed reading this book and it inspired me to make a simple night light to show my child how to track the phases of the moon!
Looking for more moon books to read together then check out our Best Moon Books for Kids.
How to Make a Phases of the Moon Light Up Banner
Equipment Needed
- Circle to draw around
Materials Needed
Instructions
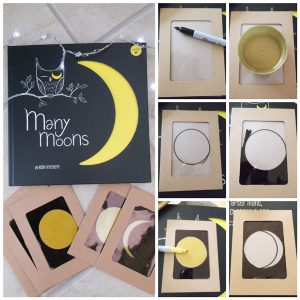
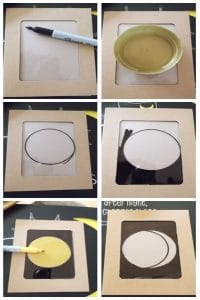
- Place your circular object to draw around in the centre of the plastic window and draw around it with a black marker.
- Using the black marker pen colour around the outside of the circle to make the night sky
- On 1 window colour in the circle black as well.
- On a different window colour in the circle with a yellow marker pen

- Using the circular object draw around it to create waxing and waning moons on all of the other envelopes.
- Carefully using the black and yellow markers colour in the waxing and waning moons on the envelope to create a sequence of the phases of the moon.
- Before you proceed make sure that your moon phases are completely dry.
- Carefully place an envelope in the order of the moon phases over each of the battery operated fairy lights. Attach in place on the wire with a small clothes peg.
- Hang up in place and then switch on to display and lit up lunar cycle with your very own moon phases night light or display.
More Activities for Learning About Phases of the Moon With Kids

Learn about the lunar cycle and the phases of the moon when you code the changes in this Fun Moon Phase STEM activity to help children learn waxing and waning moon sequences.


Helen From CrArty
Helen Newberry runs CrArty which is dedicated to the arts and crafts. She is a published author, art historian, teacher and business woman.
CrArty Kids has developed into a whole section of CrArty which is dedicated to learning about art and crafts. The focus is on developing artistic, creative and practical craft skills for the younger members of the family.
You can follow CrArty Kids on Facebook as well as CrArty on Twitter, Pinterest and Instagram
Very creative! I think my 3-year-old will love this! gotta try it sometime x