Nativity Texture Art
It’s finally time to take out our Christmas books again. I like to pack them away after Christmas and then keep them hidden until the following December. This helps to keep them fresh and exciting every year.

My kids are growing up fast now, but they still love our copy of the Usbourne’s Touchy-feely Nativity Board Book. A simple adaptation of the traditional Nativity for young readers, complete with pages filled with different textures to touch and feel, as you read along together. My daughter loves it now that her big brothers can read it to her as well.
Our love for this book and all things recycling provided the perfect inspiration for a recent art project at home. Our Nativity Texture Art project uses lots of different textures, just like in the book.
We love to incorporate junk materials in our projects over here at Crafty Kids at Home and this activity is filled with some of our favourites. We can’t do a junk art project without our favourite bubble wrap. We also have an excess of felt scraps right now, as the kids are learning to sew Christmas decorations this year.
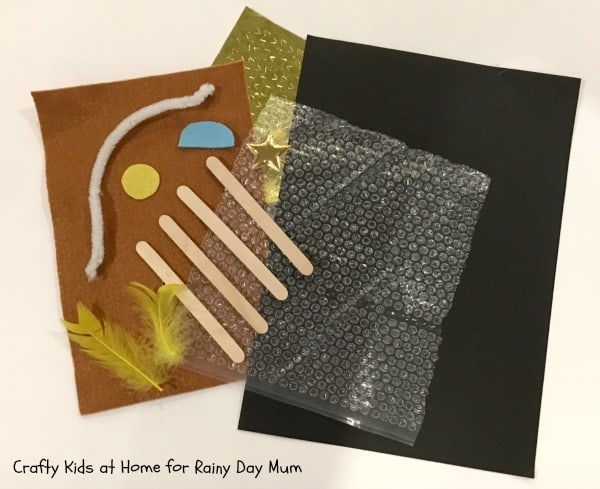
Supplies
Black paper
Bubble wrap
Brown, blue and yellow felt
Lolly sticks
Feathers
Pipe-cleaner
Fabric Star
Star stickers
How to make Nativity Texture Art

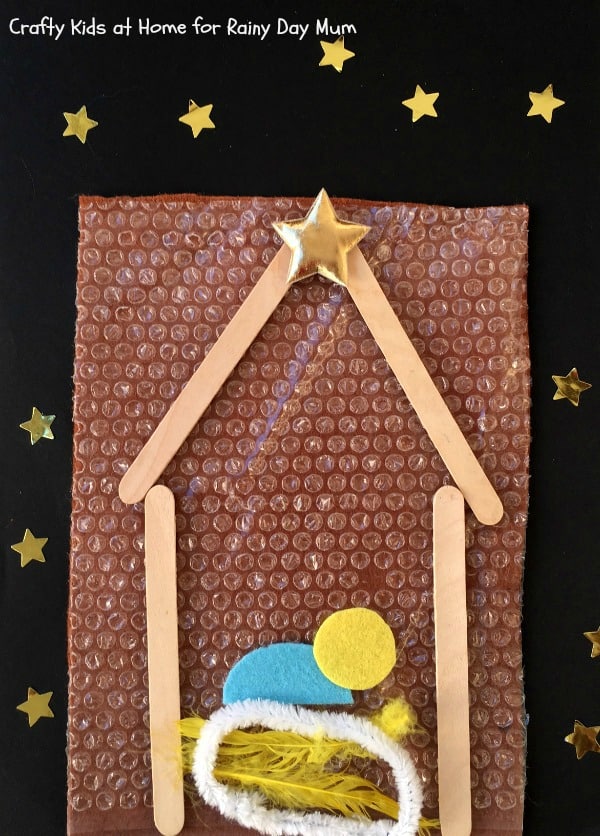
We began by gluing around the edges of a sheet of bubble wrap and attaching it to the sheet of brown felt.
Next we laid out the lolly sticks to make a stable shape and then glued them down.
We made a comfy bed for baby Jesus out of yellow feathers and a crib using a white pipe-cleaner.
Baby Jesus was then crafted from some yellow and blue felt scraps.
I found a packet of shiny fabric stars at the bottom of our Making Box and we attached one to the top of the stable. You could also cut one from yellow felt.

Finally we glued the stable down onto a sheet of paper and added a few gold star stickers in the night sky.
We can’t wait to add this to our Christmas art display at home. This design would also work great on the front of a Christmas card.

More Nativity Activities for Kids
Pin this post to make later

Share this idea with friends on Facebook


