

Celebrate Summer – Ice Paints
Keeping cool and getting creative is a lot of fun in the summer – we’ve been trying our hand at some ice painting using the creation of the paints to practice some colour theory mixing primary colours to make secondary colours as well as using fine motor skills.

Ice is a great medium to paint with in the summer, it melts adding in changing states and some science learning as well as get creative with some process art in the garden. With T we’ve been working on colours and it would appear she’s a kinetics learner mixing colours, pouring them and being part of the experience is helping her with colour names and cementing them in her memory.
Materials needed to make Ice Paints
Water
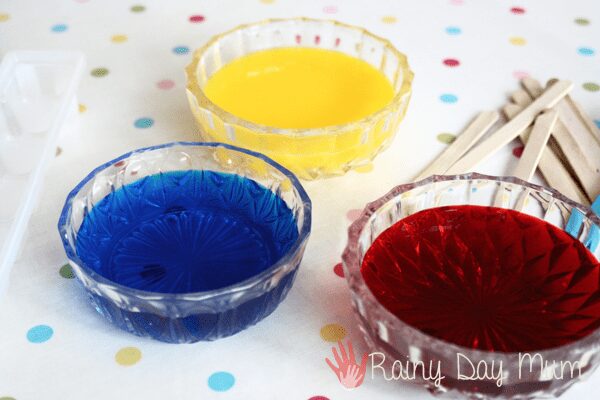
Food Colouring in Red, Blue and Yellow
Spoons – Teaspoon, Half tea spoon are good sizes
Craft Sticks or lolly sticks
Ice Cube Tray
3 Bowls
How to make Ice Paints
In 3 bowls add water and add the red, blue and yellow food colouring to a bowl each. Talk about the 3 primary colours, even if you have a toddler it’s a good start to talk about these 3 being the main colours that you can make all the other colours with.
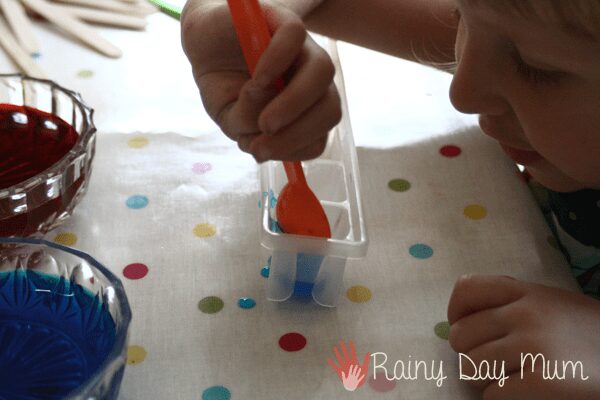
In an ice cube tray work out how many sections you have in total you will have 6 different colours so you need to divide it up to have a fairly balanced selection of each of the different colours. We used 2 slim line and ended up with 3 of 2 of the primary colours and then 4 of one. The same with the secondary colours.
Using a the larger of your spoons get your child to fill each of the ice cub sections with the colours – fill up one set with blue, one set with red, one set of red. T loved filling them and as she poured started to notice that if she wasn’t careful the colours would start to mix and make new colours.
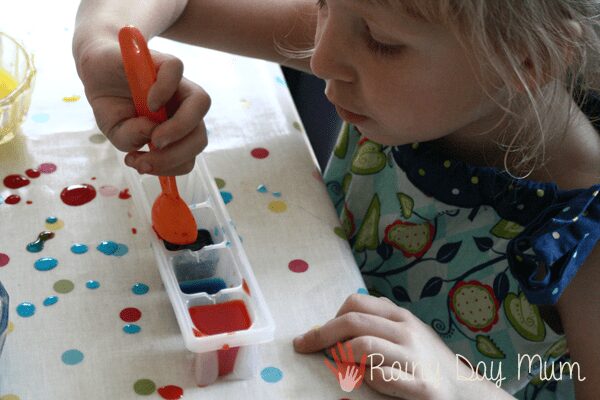
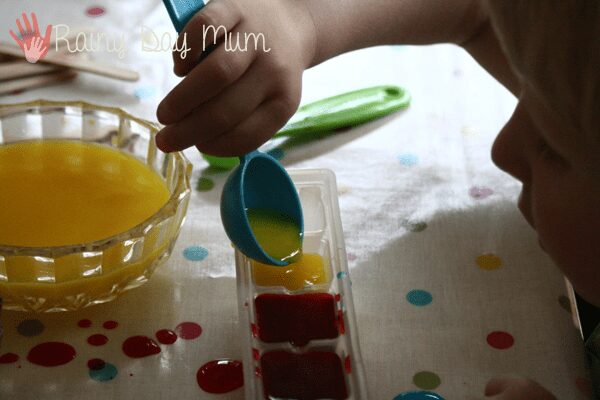
With all of the primary colours filled we used the smaller spoon and filled half of the second posts and added a different colour to the mix producing our secondary colours – she always finds it magical how two colours can mix to produce new colours.

With a craft stick cut in half we put one in each of the holes and then put them into the freezer to freeze – we left them 24 hours to make sure that they were really frozen, but they would probably have been ready sooner.
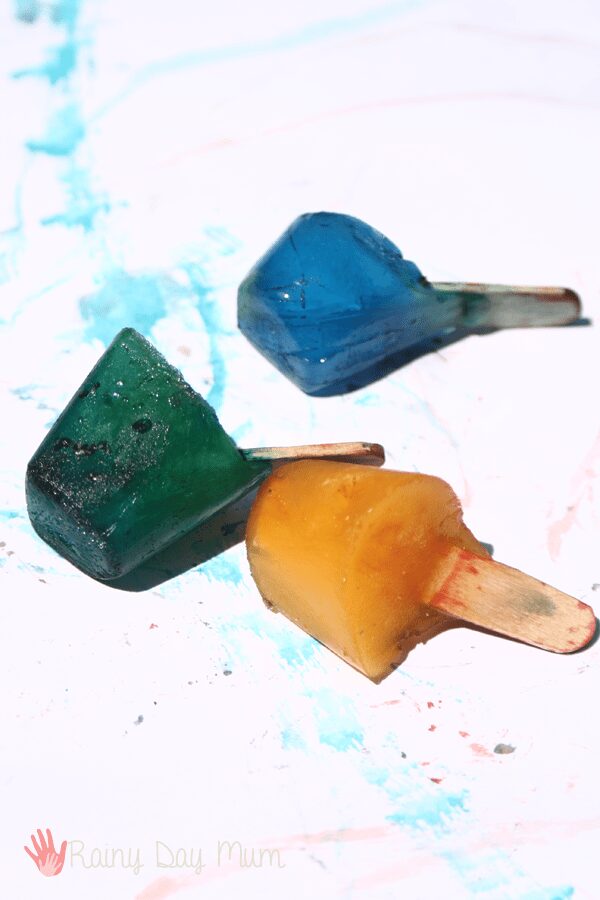
Outdoor painting is great in the summer and using the ice paints keeps the kids cool. Once they are frozen I take them out of the tray and put in a zip lock bag in the freezer so I can make some more and take only a few out at a time for some painting fun.
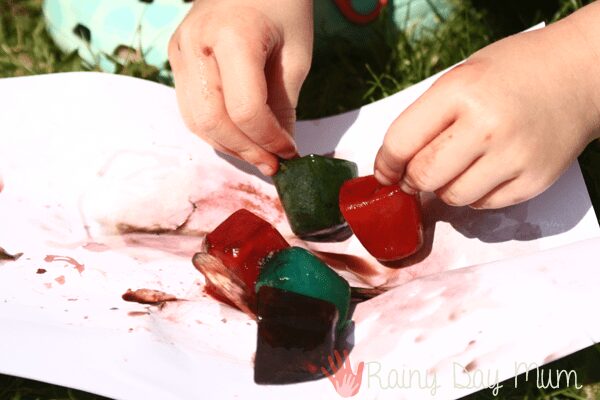
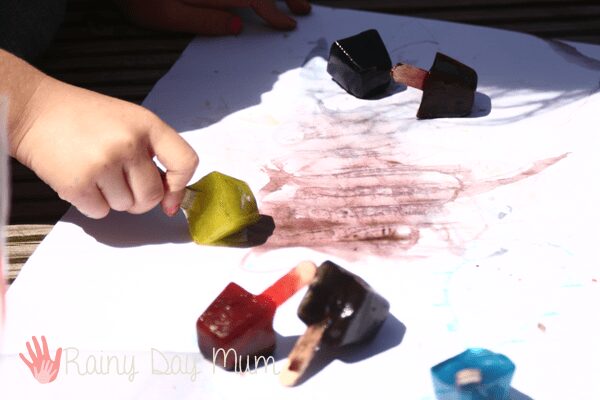
Whilst painting we turn it into a sensory experience – feeling how cold they are watching as the melt and the colours mix together on the paper. We’ve painted on our deck which produces a textured finish.

As well as painting on the grass. T loved using the ice paints to paint her hands and then make hand prints on the paper with them.
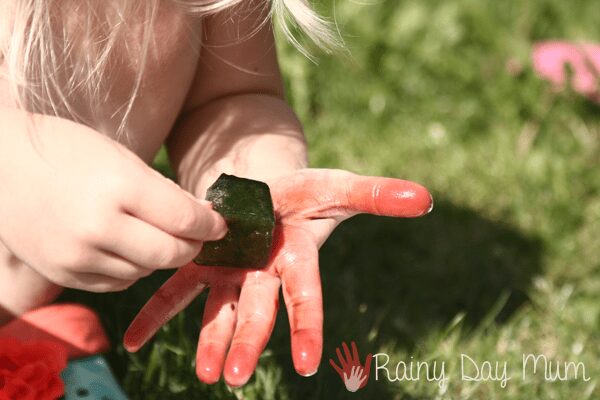
Because of using food colouring they will stain the hands for a little while but the colours are vibrant and it’s a great way to use up expired colouring that you may have.
Love this idea for getting creative with water this summer – then check out the other 9 ideas included in our Top 10 Ways to get Creative with Water this Summer.

I love this idea! Such a fun way to get messy, very summery and you create something at the same time, it’s perfect 🙂
So nice! Kids dont need brushes with this. Thanks for sharing =) #countrykids
Great idea, I must try it out #CountryKids