

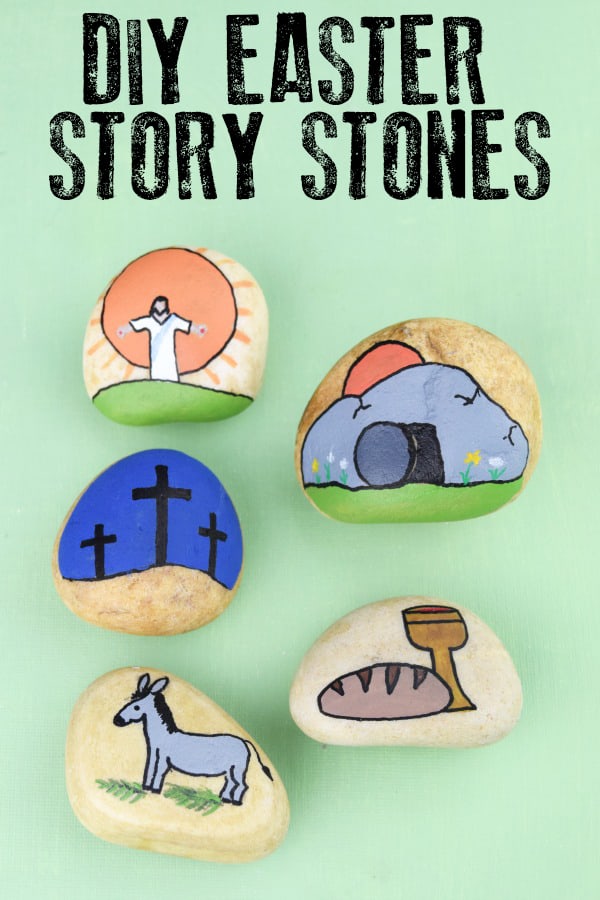
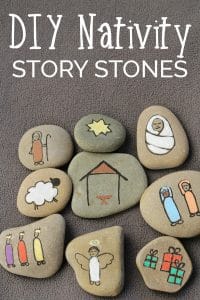
Easter Story Stones
The message about why we celebrate Easter hides behind the Bunnies and Eggs. Many children don’t know the Easter Story. But you can help them understand by creating and use these story stones and notes to teach them. Follow this easy tutorial and make your own holiday Easter rock painting set.
Why teach the Easter Story?
In our world conflicts and wars happen due to religion. One of the ways that we can help future generations is by teaching our children about the religions. Knowing their beliefs, how they celebrate, and the stories helps children be open-minded.
Many many years ago I was in charge of religious education in a small primary school in the UK.
The highlight of that was taking the whole school to London and visiting a mosque as well as one of the museums. The school, was Church of England school and for many children they had not left the county. Seeing the awe and wonder made the trip and I realised the importance of teaching religion.
The Easter Story, is one of the most important Christian celebrations in the year. Over time the reason behind why we celebrate it as Christians is being lost. Telling the story through play and crafts can help children to understand Easter.
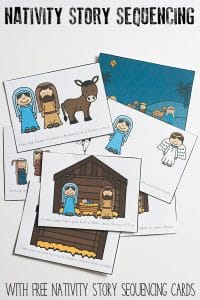
Reading aloud from a children’s bible. Then using these DIY story stones can help children to understand the sequence of events.
The sequence of Events in the Easter Story
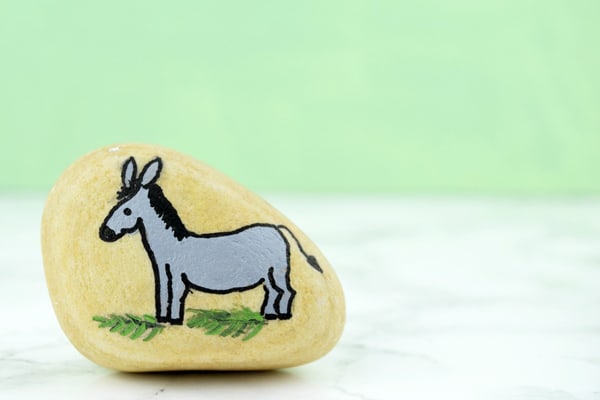
Palm Sunday
Palm Sunday is the Sunday before Easter. When Jesus had the royal treatment as he arrived in Jerusalem. People laid down palm fronds as he rode a donkey into town and sang, “Hosanna” which means saviour.
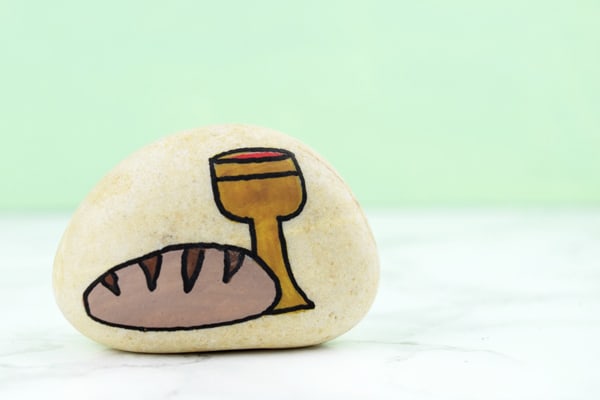
The Last Supper
Jesus shared a meal with his disciples and told them that one among them will betray him. He knew that one will betray him, but still shared his bread and his wine with all.
Jesus told them that the bread they shared is of his body which he will sacrifice for them. The wine they drank was of his blood which will wash away their sins.
Jesus taught his disciples and important lesson when he washed their feet. “That they should treat others as they want other to treat them.”
Betrayal and Crucifixion
As Jesus said, the disciple Judas betrayed him. He took money in exchange for giving Jesus to Pontius Pilate and his soldiers.
They nailed Jesus to a cross between thieves and he was ridiculed and mocked before his death.

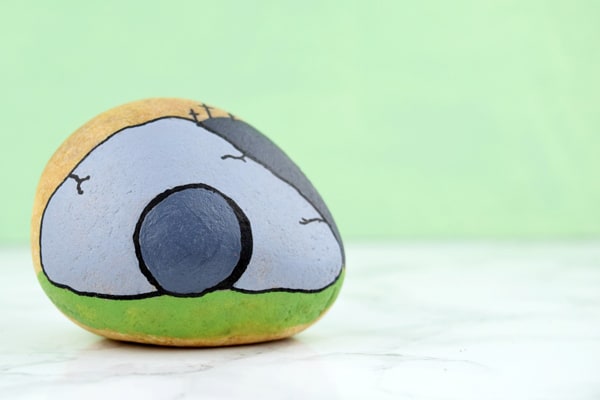
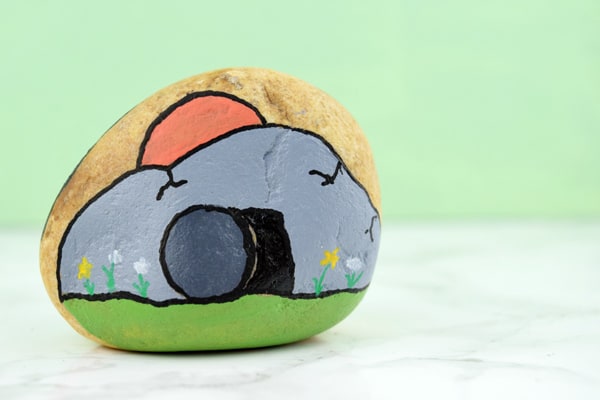
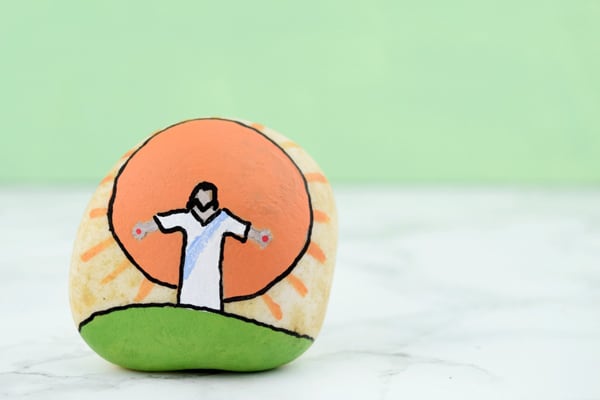
Tomb and Resurrection
When Jesus’ died they took his body to a rock tomb.
A large boulder was rolled to cover the entrance so that no one would have access to him.
Three days later, Mary and Mary Magdalene came to prepare Jesus’ body and found the tomb empty.
Jesus had risen.
Supplies for Your Easy Easter Story Painted Rocks
We have included affiliate links to products we used and resources we recommend. If you buy via these links we may earn a small commission.
This is a simple craft and you likely have everything on hand. You can choose to add a simple drawstring bag as a storage pouch.
5 Rocks (left natural or primed)
Acrylic paints and small brushes
ModPodge (or glue + water mixture) to protect and seal the paint and a foam brush
Polyurethane sealant (if placing outside)
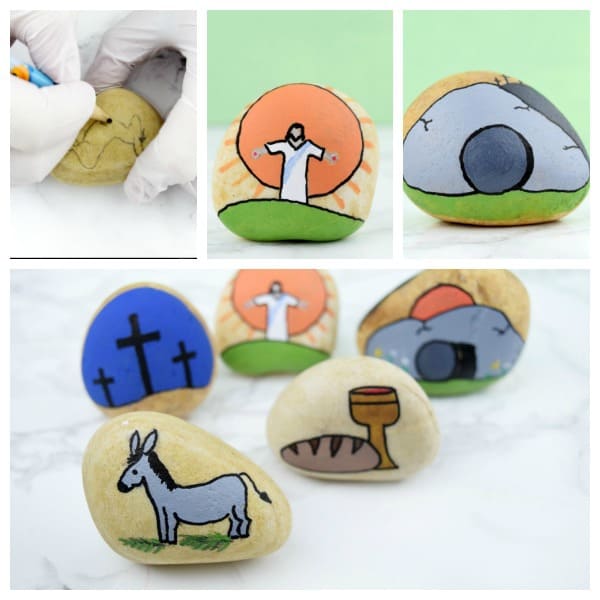
Instructions for Painting Easter Rocks
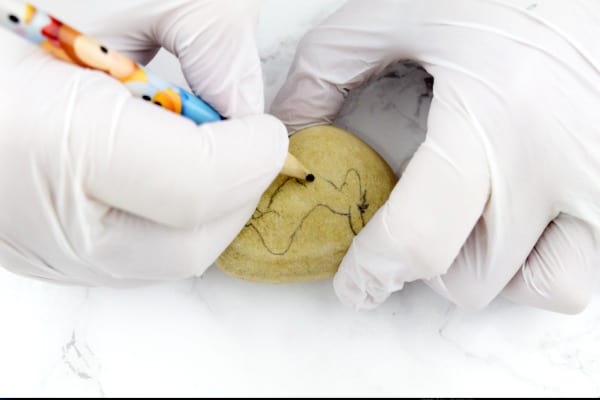
Drawing out the Easter Bible Story on your Rocks:
Sketch a donkey and some palm fronds for the first rock. Continue with the bread and wine, three crosses on a hill, the tomb (two-sided), and resurrected Jesus.
A note about drawing: this isn’t about perfection (they’re rocks, after all). If your kids are old enough to do this activity, give them the images here as a guide. If you’re creating these for a child, they’ll be more interested in telling you the story than in the artwork.
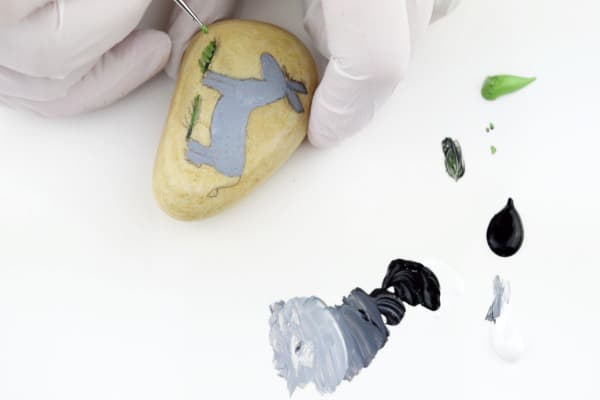
How to Paint your Story Stones:
Once you’ve sketched the rocks, set out acrylic paint and paint pens. Depending on the size of your rocks, a toothpick may work for small details like the palm fronds.
Sealing your painted rocks:
Some paints can run when you seal them. So here’s a tip: use a generous amount of ModPodge and cover your designs first – only the design. Try to limit the number of passes over the painted section of the rock.
Once it’s dry, seal the entire rock in ModPodge (for indoor play) or polyurethane (outdoor).
More Ideas for Teaching Children about the Meaning behind Easter

Check out these other ideas for Easter Activities and Crafts with young kids. Try making an Easter Gardens and one of the Cross Crafts.
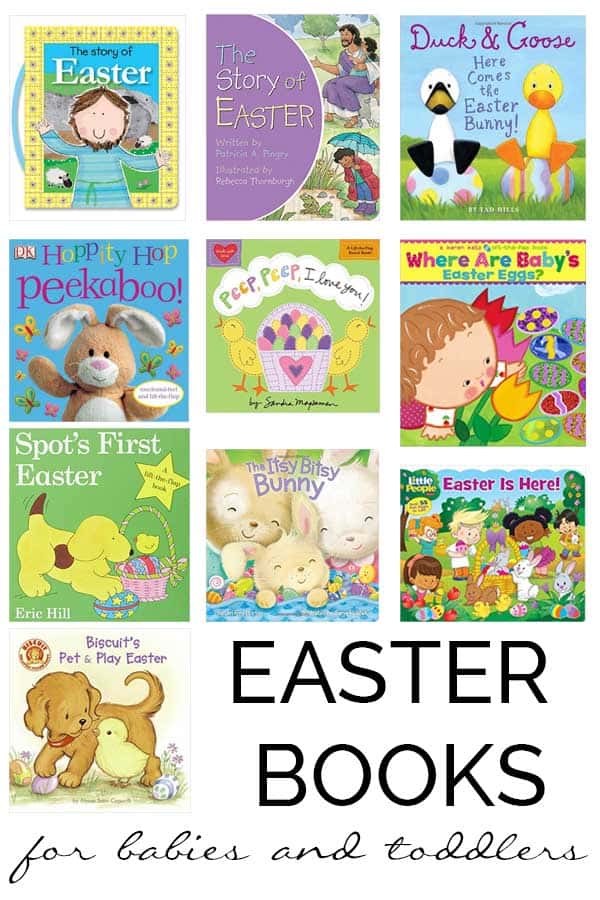
Looking for stories to read aloud check out our recommended Easter Books to read aloud with Kids. There are a couple of very basic Bible Story Books included.
Introduce more Christian Celebrations with these activities for later in the year
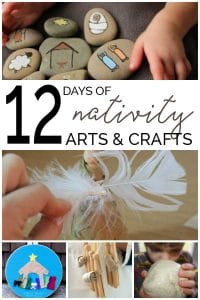
Crafts and Activities for Kids Based on the Nativity Story
 Sarah traded senior executives for sippy cups and shares her adventures in crafting at Ruffles and Rain Boots. Join her for fun, creative crafts for both kids and adults. Sign up to get creativity delivered or join in making beautiful messes with Ruffles and Rain Boots on Facebook.
Pin these Easter Themed Story Stones to Make Later
Share these DIY Bible Story Stones with Others on Facebook
Cerys Parker
Cerys is a marine biologist, environmental educator, teacher, mum, and home educator from the UK. She loves getting creative, whether it is with simple and easy crafts and ideas, activities to make learning fun, or delicious recipes that you and your kids can cook together you'll find them all shared here on Rainy Day Mum.
did you make the tomb rock double-sided? like one side sealed and one open?
No we didn’t but that would be a fantastic idea. Just makes sure everything is dry before you turn over and create the open side.
Sarah I LOVE the rock story idea! I can’t wait to make it for my granddaughter!!
You’re right, the true meaning (s) of Easter and Christmas are slowly but surely getting lost in all the hustle and bustle of the seasons
Thank youvso much for this lovely idea. My kids enjoyed this so much. ?
I am so glad. I hope you had fun making them