

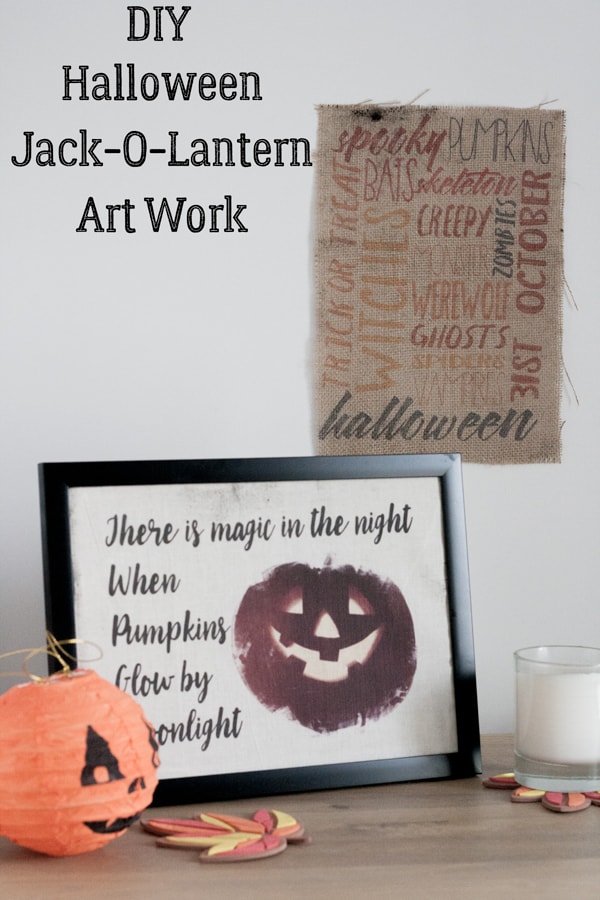
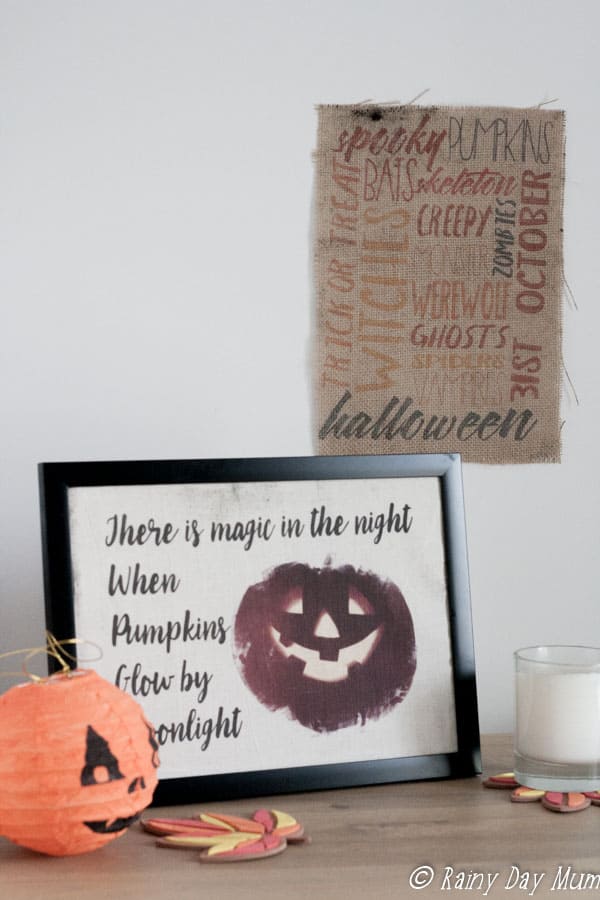
DIY Printed Burlap Halloween Art Work
As autumn draws near, I start to think towards the many celebrations during this season and into winter too. The first major one is Halloween and although not celebrated as much in the UK as in the USA, the kids do love to decorate the house a little and go trick-or-treating. I’m really not a fan of too many plastic decorations and lean more towards rustic décor, so to add to our seasonal home décor, I created a rustic printed burlap Halloween art to frame. Last month, I used Photoshop Elements 15 to create some Wooden Blocks and showed you how to transfer a photograph from the computer onto the wood. This month, I will be showing you how to print Burlap, as well as create onto burlap as well as create a rustic painted pumpkin using a Guided Edit.
This is a sponsored post on behalf of Adobe Photoshop Elements 15
Using Photoshop Elements 15 for crafting
I don’t know about you, but I have all of these wonderful ideas floating in my head for craft projects for the home. Although I am creative, I can’t say that I am the best at drawing or writing. I can’t do fancy letters – believe me I have tried but it just seems that it’s not one of my skills. Using a photo editor such as Photoshop Elements 15 gives me not just the options to use photographs and drawings in my crafting, but also to use text in whatever style I want.
Now I don’t have to try and work out how to get my words in a line or the perfect flick at the end of each word. Using different fonts in Photoshop Elements 15, I can create the look that I want.
With the photographs, the different effects I can apply means being able to look like I can draw or paint in detail (I enjoy both but I’m never going to win an award.) With Photoshop Elements 15, I can get the exact effect I want using the different Guided Edits available.
Materials Needed to Create your Printed Burlap Halloween Art Work
Burlap, Jupe or Hessian – a natural fabric works best and one that has a tighter weave will produce a deeper colour print.
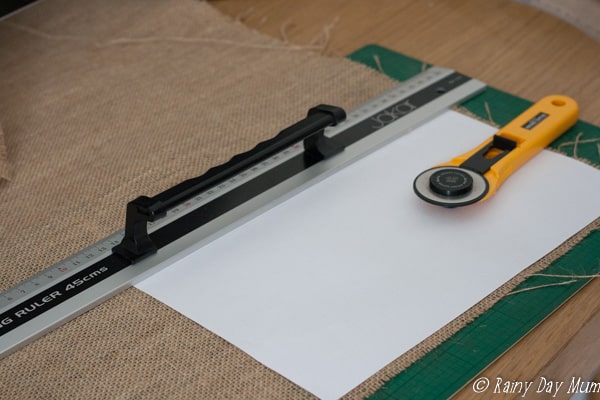
Cutting Mat
Craft Knife or Rotary Cutter
Long Rule
Pencil
Freezer paper
Scissors
Image of a Jack-o-Lantern
Font of your choice
Iron and Ironing Board
In the Halloween Art Work I’m showing you how to create today, I decided on a script-style font already in Photoshop Elements 15 (there is a whole selection of them), but you could easily look for some fun downloadable Halloween fonts. If you are looking for spooky font inspiration, check out these Halloween Fonts from Simple as That for some ideas you could use in the project.
How to create your DIY Halloween Art Work for the Home
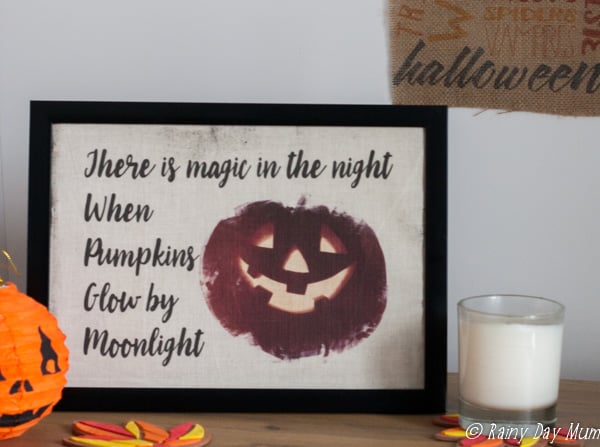
I’ve always wanted to try printing onto fabric. For our Disney T-Shirts, I used iron-on transfer paper, but after the success of transferring a printed image onto wood for our Autumn Wood Blocks, I wanted to try transferring a photograph onto some burlap for natural decorations in the home. In the video below, I give step-by-step instructions on using the Painterly Guided Edit in Photoshop Elements 15 to transform a Jack-o-Lantern.
The Painterly Guided Edit makes an image look a little textured and rougher around the borders, like a painting. I have gone with making the pumpkin look rougher around the edges and then applied some additional edits to darken and make the pumpkin spookier.
How to Prepare and Print onto Burlap
Isn’t it amazing what you can get your basic home inkjet printer to do with some freezer paper (fast becoming one of my favourite crafting materials), the material, and an iron?!
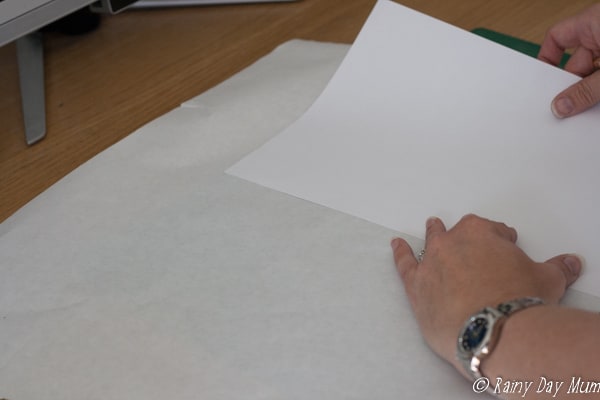
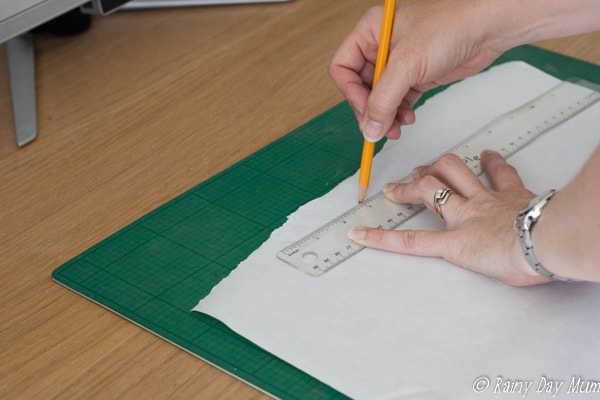
- Measure out your paper size onto freezer paper – use a piece of printer paper as a template.

- Cut out, making sure that it is the same size – you can buy freezer paper sheets, but as I use the freezer paper for freezing as well as crafts, I tend to buy the rolls.
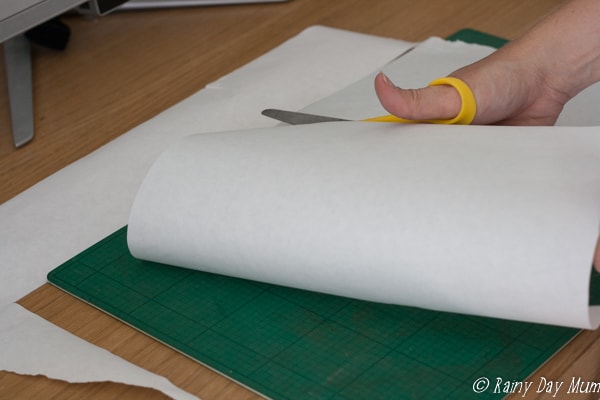
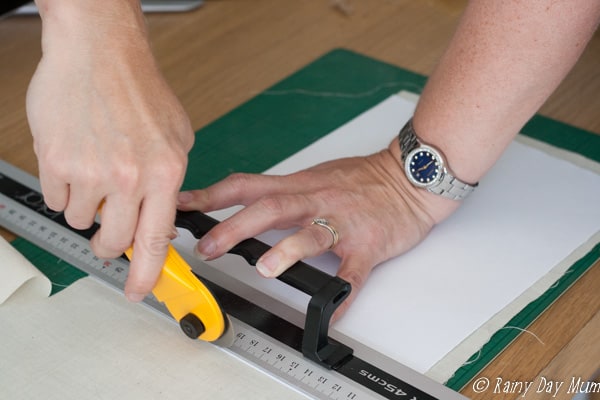
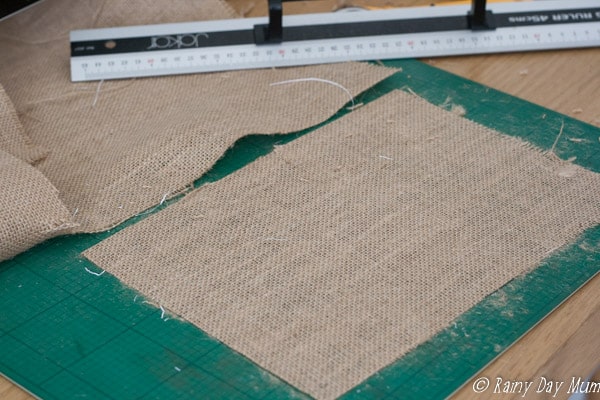
- Now cut out the same size on your burlap and lay out your material onto a cutting mat.
- Place your printer paper onto the material.
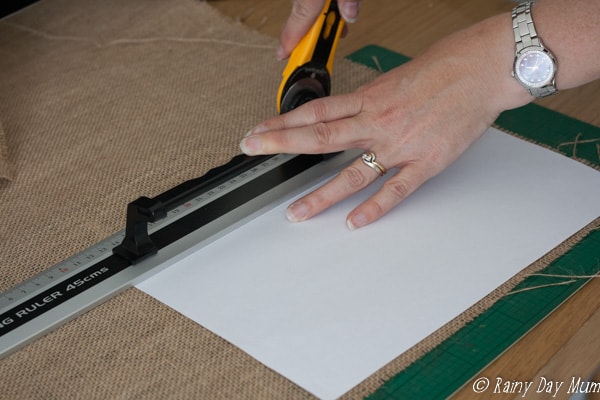
- With the metal ruler placed along the paper edges, carefully cut using either a rotary cutter or craft knife.
- Turn the mat so that you get the best angle for cutting.
- Time to make the burlap printer-ready. With the plastic side of the freezer paper touching the fabric, iron the paper side (it will wrinkle but that is normal).
- Trim off any excess fabric
- With the burlap backed with freezer paper place in the printer so that the image will print directly onto the burlap. The freezer paper acts as a stiffener to allow the fabric to go through the rollers on the ink jet as well as a retainer so that the image has time to set onto the fabric.
- Peel off the freezer paper backing once your image is dry.
- FRAME


Pin this to make later

Share with Crafty Friends on Facebook
